Lonely lonely blog has been lonely for too long. I think life hit all of us sisters at the same time. It has been busy. Jen had her baby boy Blake, and then Morgan got pregnant with her third and had him today, and then for me....I got really sick with my Crohns which took me out for a long while. Wish I could say that I was out from having children and what not haha but it just isn't my time yet. We apologize for keeping you all waiting on posts. Hope we haven't been forgotten. Time to come back and share what we love.
I am going to post a new aspect of my portion of the blog. I am starting my own business of repurposing and refurbishing furniture and décor called Ramshackle to Rubies 😃 I am so excited to get started and share my projects with you all. So stay tuned...
Monday, November 3, 2014
Saturday, January 25, 2014
Sweet Chicken Salad
Today I would like to share with you the easiest yet most delicious salad with you. Never thought I would crave a salad until now :)
Sweet Chicken Salad
Ingredients:
grilled chicken breast, cubed/sliced
handful of baby spinach
sliced strawberries
blueberries
walnuts
honey
Throw all the ingredients together in a bowl with desired amount of honey. I put a lid on mine and shook it all together to get a nice coating.
I dont think it gets much healthier than that. I definitely would say that I would share this salad at any event or potluck. So delicious!! Hope you Enjoy and Happy Saturday :)
Thursday, January 16, 2014
Fabric Flowers.................. baby gift/gift wrapping embellishment!
Looking for an easy baby gift!?
OR
What about some fun kids room decor??!
Fabric Flowers
A lady in my ward that I worked with in the Nursery gave these to me as a baby gift (for Linkyn---my first boy) and I just will always think it was so clever!
What a fun idea for a baby gift/gift wrapping embellishment :)
What you'll need:
* a pair of fun colored/patterned socks (and age or size) (the dollar store has some in packs! ;)
*some fake floral stems with a couple leaves for each flower you decide to make (fake flowers at the dollar store as well ;)
*some green floral tape
Steps:
- Roll your socks until satisfied with the look, then wrap the base until tight enough
- then, do not cut the tape yet!...hold flower to the stem and continue wrapping the tape to secure it to the stem
- do this with each flower you make, then wrap the floral tape all the way down the stem when you have finished your last flower to finish it off!
It's that easy!
Monday, January 13, 2014
Back Into Action
Those of you who have a blog will probably understand how difficult it can be to keep it consistently updated, especially through the holidays. Jen just had her 4th baby which is very exciting. Unfortunately, we probably wont see a post from her for a while. My holidays were great! I wish I could have permanently had time off though haha I am back to work again. 2014 is going to be a great year. So many new goals and plans. I hope all of you have written down some resolutions. I have learned that it is not about completely achieving your goals but making steps and trying for them. To start off the new year, I would like to share a breakfast recipe.
I like to use ground pork to make my own breakfast sausages. I decided, instead of making patties, I would just cook it ground up and add all my seasonings, and kind of make a breakfast hash. Keep in mind that you can add potatoes and what not to this. I cannot have grains so I left them out :)
Scoop the sausage and place in a bowl or plate, add scrambled eggs on top (if you can have dairy, top with cheese) and then add avocado slices if you so wish. I love avocados with eggs so I couldn't resist.
Maple syrup drizzled on top would be very delicious but for those of you who are like me and can't have maple syrup, honey definitely does the trick. :) There you have it, simple and easy. Hope you enjoy!
I like to use ground pork to make my own breakfast sausages. I decided, instead of making patties, I would just cook it ground up and add all my seasonings, and kind of make a breakfast hash. Keep in mind that you can add potatoes and what not to this. I cannot have grains so I left them out :)
Quick Hash
Ingredients:
Ground Pork
Diced Onion
Fennel Seed
garlic powder
red pepper flakes
salt/pepper
cayenne (if you like it spicy)
eggs
Avocado (optional)
Ground the pork adding all the desired amounts of ingredients. (If using potatoes, dice and cook in a separate pan before adding to drained pork.) After browning the pork, drain the excess fat. In an another pan, scramble up your eggs.
Scoop the sausage and place in a bowl or plate, add scrambled eggs on top (if you can have dairy, top with cheese) and then add avocado slices if you so wish. I love avocados with eggs so I couldn't resist.
Maple syrup drizzled on top would be very delicious but for those of you who are like me and can't have maple syrup, honey definitely does the trick. :) There you have it, simple and easy. Hope you enjoy!
Wednesday, December 11, 2013
EASY window Snowflakes [recycled]
To make your own recycled snowflakes, you will need:
- clear packing tape
- white paper (or color of choice)
- scissors
- window cling hooks (like picture) or just plain ol' scotch tape!
- creativity :)
steps:
- Simply cut circles of the size snowflakes you would like to display (or many sizes, as I have done)
- Then fold your circles a couple to few times...and cut shapes and things to create a unique snowflake :)
- Once all snow flakes are cut, lay strips of packing tape across the top of your flake, slightly over lapping to create a nice good home-made 'lamination'.--making sure to have your strips of tape being slightly longer than your flakes, to allow for room to cut off the excess tape, creating a nice circle finish.
- Once all flakes are laminated, either use a few rolled up pieces of scotch tape and stick to your window, or buy some suction hooks[bought mine at a 'Honks' store here in provo...for 88 cents! (as I did in my pics for this year), both options look very nice :)
Have fun, and enjoy the winter and holiday season!!
Saturday, November 23, 2013
Smoothies in the Fall
It is definitely getting chillier in my neck of the woods but that definitely doesn't stop me from making a delicious smoothie! I absolutely love this smoothie! I hope you guys like it too. I tend to make it for breakfast but it is easily a healthy lunch substitute.
Peanut Butter and Apple Smoothie
1 apple, cut up into cubes
1 banana
1/4 cup of apple juice (no other ingredients, read the label)
1 tbsp. of peanut butter (check ingredients, should only have salt and peanuts. No added sugars)
1 tbsp. of honey
12-15 ice cubes
Place all the ingredients into a blender and blend well to get all the ice chunks! Serve in your favorite glass ;)
Hope you all have a wonderful Thanksgiving week!
Monday, November 11, 2013
The 'I am Thankful' Wreath!
So I got the idea for this craft from lasts years november family fun magazine :)
Here is what it looks like:
I thought the white writing was just adorable, but my white colored pencils just weren't making much contrast on my paper, so If you wanted that same look i would suggest maybe using a white out pen of some kind or a fine tipped white marker...?
So I decided to just use a black inked pen, and I am very happy with its turn out :)
Ideas: This is such a great thing to have up at the beginning of the month. 1 Each day, as your family goes about their days... I am sure many things that you find yourselves grateful for comes across your mind :) When you are home or arrive home, make sure to jot them down and add them to your wreath, by thanksgiving you should have a beautiful decoration! 2 Each new thanksgiving you can start a new wreath, or keep up the old one and reminisce on your past gratitude wreath ;)
3 Use this wreath as a fun family activity, whether for a thanksgiving party, or a family home evening!
Here is what you need to make your own:
- Fabric of choice, although I had a festive (neutral) patterned fabric scrap laying around that was perfect for this!
- And a this green floral/foam wreath I found at the dollar tree.
- Also some sewing pins (to secure fabric to wreath and then many for attatching leaves!)
- Pen and scissors
- ribbon + good tape or some way of hanging that you like (I used some thicker ribbon and taped it to the back side of a door or cabinet!)
Wrap your fabric around until you like it ;)
pin the ends
hang in desired spot, and start 'being thankful' and pin on your leaves !
Hope you all have a wonderful Thanksgiving!
Saturday, November 2, 2013
Pumpkin Pie Smoothie
I hope you all had an awesome Halloween. I had no plans but I still dressed up haha I love dressing up for Halloween. It is the one day that you can get away with dressing up all crazy and fun! I figured out a costume Halloween morning to be a mime. I just wore a striped shirt, black jeans, black shoes, and a black hat. Then I did my eye liner using some google images as inspiration. I didn't do white gloves, or a white face, or red lipstick, buuuut everyone knew what I was :)
Smoothies are one of my favorite things to have for breakfast or dessert! haha I absolutely love them, and, because it is Fall, I have been trying pumpkin flavors in everything. I made this smoothie and it is dairy free! If you aren't dairy free, you can use your own dairy options.
Pumpkin Pie Smoothie
1 handful spinach (optional of course. I like the added nutritional benefits)
1/4 cup pumpkin puree
1 banana
1/4 cup coconut milk
1 tbs honey
1/2 tsp vanilla
1/2 tsp pumpkin pie spice (cinnamon, ginger, nutmeg, and cloves)
10-12 ice cubes!
I hope you enjoy this recipe as much as I did :)
Happy November!
Monday, October 28, 2013
easy DIY Friendly Ghost! [recycled]
What you need to make your own friendly ghost:
- white wash cloth
- poly-fill (or some stuffing like it)
- buttons and hot glue gun
- white pipe cleaner (you could really use anything you have/like...)
- green sparkling apple cider bottle (or any colored wine bottle that you like)
- piece of scrap book paper
Steps:
- take wash cloth and place desired amount of stuffing in the center
- bunch it together and kinda fold it in half below the head (like where the neck would be ;)
- take your pipe cleaner, place the ghosts neck about 1/3 IN from the end of the pipe cleaner (to allow for extra pipe cleaner after twisting to create loop for hanging!) and snuggly wrap it and then twist the pipe cleaner until secure...
- then, take the end of the pipe cleaner and bend it to become a loop, tuck in under the noose and twist it/cover it.
- cut piece of paper to size of the flat section of your bottle
- hot glue ends to bottle (*and use scissors to flatten once the paper touched the hot glue!)
- Hang your ghost!
HAVE FUN!!
Saturday, October 19, 2013
Fajita Bowl
I am all about Mexican food and fajitas are one of my favorite dishes! Here is a healthy way of eating them. No need for a tortilla!
All of the ingredients do not have a set amount. It all depends on how many you are making for. I will mention how much I used to give you something to go off of...
Fajita Bowl
(2-3) Chicken Breasts, sliced into thin pieces or chunks
(1/2) red bell pepper, sliced
(1/2) green bell pepper, sliced
(1/4) Onion, sliced
(2) garlic cloves, minced
Lime Juice
Coriander
Salt and Pepper
Paprika
Cayenne Pepper
Oregano
Cumin
EVOO
Water
Add sliced chicken into a pan with a little bit of EVOO. Set to med-high heat.
Stir chicken around while being cooked. When chicken is close to being done add all the rest of the ingredients. If there is a different seasoning you want to use, go for it. They are your fajitas after all :) The water part is if you would like to add a little water to help spread the seasonings onto your chicken. It gives movement and helps coat everything.
Now, I served my fajitas over cauliflower "rice". I use this option instead of real rice. If you have no intolerance to rice, feel free to go for that option. Brown rice is definitely a good choice. For those who are interested in the cauliflower option, here is the recipe.
Cauliflower "Rice"
Take one head of cauliflower and cut it into smaller florets.
Use a food processor with the grader attachment.
Feed the cauliflower through the processor grader and you will get fine rice-like shaped cauliflower. Add the riced cauliflower to pan and set to med-high heat.
I like to add some EVOO at this point. If you can have dairy, add some butter or anything you like.
If you want to make cilantro lime rice, add some lime juice and diced cilantro while it is heating on the stove.
Once heated up on the stove, you can now serve some in a bowl and add your fajitas to the top! Use some hot sauce as well to give it a kick. ENJOY!! :)
Tuesday, October 15, 2013
BOO-tiful bookshelf [Possibly RECYCLED]
What you need to make your own 'BOO!' Letters:
- 4 boards of any kind (mine were the shelves from a dvd stand that broke---never throw that kind of thing away!)---Canvas OR Masonite board (which is what I used for my spooky tree painting)...link is here http://threetimesthelady.blogspot.com/2013/10/paint-something-eerie.html
- Spray paint the color of choice (mine were already black which made that part easy)
- The THICK poster/display board--can find it at most grocery stores in the school supply isles or office supply stores.
- Hardy cutting scissors OR easiest would be a box cutter of some kind (Ex: Utility knife, Xacto Blade...)
- Scrapbook paper and embellishments of your choice!
- (I used: twine, buttons of different colors + size, modge podge to apply and coat over the finished product, googly eyes a-top some buttons, acrylic paint to cover unfinished sides of my recycled shelves, glitter!, and...of course, hot glue :)
---Everything is attached with hot glue or modge podge (paper)!
Have Fun!
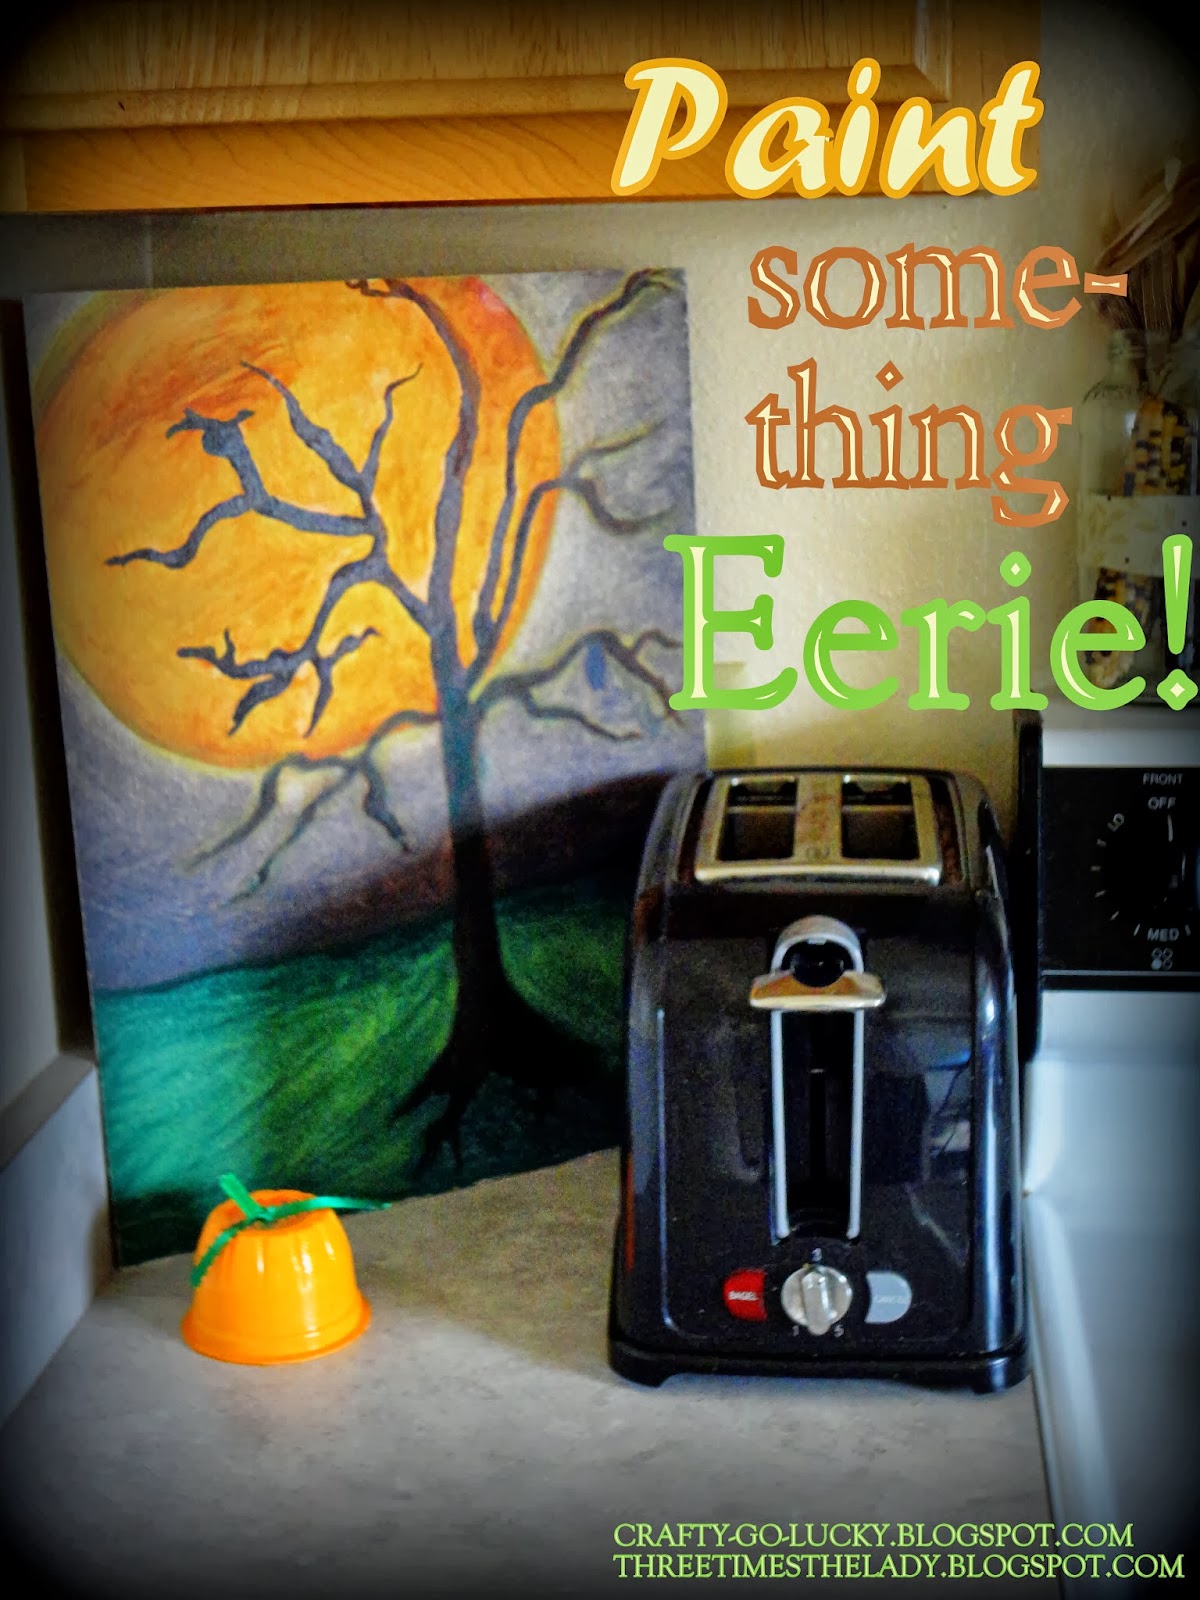
Paint sOmEtHiNg eEriE!
I painted this I believe in 2006?? In an oil painting class I took at school. We did lots of versions of trees and one of them I decided to do a sort of Halloween feel, so now...I decided to incorporate it into my home decor! [to enjoy it some and not keep it in a box all year ;) ]
If you would like to make one for your self, here is what you'll need:
- Go buy a canvas (or Masonite board/panel as I have used [lots thinner] + a TON cheaper)--got mine from Home Depot [...and just have then cut the main board into all different sizes for a variety and use in other future projects!] ---about 1/4 in thick
- [SO YOU DECIDE------If you decide to get the Masonite board you will also need to get some Primer (Called 'Gesso') and apply about three coats before starting your art work (sanding in between is optional depending on how much effort you want to put in or the desired look you are going for) The Gesso gives you a clay like surface and is great for wanting to paint multiple layer (like with oil painting)---otherwise the canvas is already to be painted on!]
- Get some oil paints and brushes and start painting!
- *optional: paint thinner and whats called a 'medium' (for mixing into paint for smoothing or texture, etc.)
Get Painting and have fun!
Sunday, October 13, 2013
DIY Bat Decor
I am in love with my bats!! I made them last year for halloween and I always get compliments on them. The cheapest halloween decor EVER and super easy!
All you need:
1 black poster board (bought mine from the dollar store)
1 pair of scissors
bat pattern
pen or pencil
tape
1. I found this pattern online on google search. Copy and Paste this image below into Microsoft word and size the image to be three different sizes: Large, medium, and small.
2. Print out your patterns and then cut them out with scissors.
3. Trace the pattern with your pen or pencil the amount of bats that you want onto your black poster board.
4. Cut out your outlines and then bend the wings slightly at the first point on each wing. This allows the bats to be 3D on the wall.
5. Roll a piece of tape and place on the back of each bat, and then stick to where you want them to be.
There you have it. Easy and Cheap! Happy October!! :)
Sunday, October 6, 2013
Entryway fall decor
My entry way table was decorated with pumpkins from the dollar store and target. the crows were from the dollar store. I have two tree branches in jars. the candle sticks I got at a yardsale for $1 each and the cool black orb tea light holders on top of my candlesticks are from the goodwill. I also wrapped burlap around my mid century lamps that I got at the goodwill, to make stripes. the tiny wreath I got at homegoods for $5.
I found the gold leaf branches at the dollar store. the owl I got at the goodwill and the bird cage I got from outside a dumpster. hehe!
I got the pumpkin and wheat from the goodwill and the orange vase from homegoods.
the pumpkin and hatboxes I got at the goodwill. I put $20 black trees from walmart ontop then I draped a grass hula skirt from the dollar store around the bottom of both trees. I put burlap, gold feathers, pumpkin sticks, leaf stick, crows, green twisty sticks, and a little black owl at the top. it was almost all from the dollar store! yay!
Subscribe to:
Posts (Atom)
.jpg)